
When I travel, I like knowing my servers are only a tap away, and secure, even on public Wi-Fi or hotel networks. My GL.iNet Slate 7 with Tailscale makes that possible, and everything just works across my laptop, phone, or tablet. I don’t often need to share my setup, but it’s reassuring that friends can access my server services seamlessly without installing Tailscale, a handy “just in case” feature that saves me from playing tech support on the road.
Back at home, though, is where the Slate 7 really earns its keep. My main purpose for this little router is routing server traffic intelligently, sending specific domains or IP addresses through my home internet. It’s a quiet role, but an important one, giving me control over how my servers handle connections without adding complexity.
In this post, I’ll walk through how I use Tailscale on the Slate 7 both while traveling and at home, showing how a small device can make server access simple, flexible, and reliable.
Slate 7, Meet My Serversh3
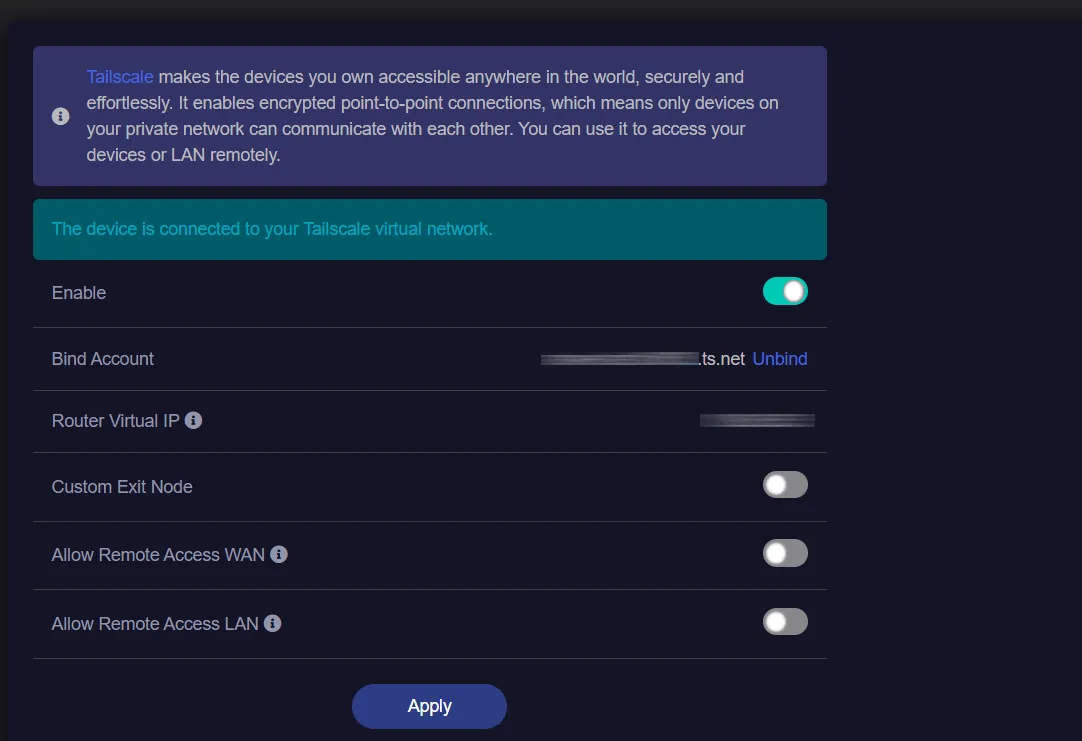
Tailscale is supported on Slate 7 out of the box. To setup Tailscale you can follow this guide from GL.iNet website.
After setting up Tailscale on my router, my first instinct was to ping my server at 100.92.73.116 from my laptop and of course, it didn’t respond. Curious about what was really happening on the wire, I SSH’d into the router and fired up tcpdump to spy on the ICMP packets. Sometimes the best way to debug is to eavesdrop on your own network traffic.
If SSH isn’t already enabled on your router, you can turn it on from the Web Admin Panel by heading to the Security tab and opening Management Control
Inspecting the Packets🔍h4
tcpdump -nS -i any icmpHere’s the result:
tcpdump: data link type LINUX_SLL2tcpdump: verbose output suppressed, use -v[v]... for full protocol decodelistening on any, link-type LINUX_SLL2 (Linux cooked v2),15:47:45. eth1 In IP 192.168.8.191 > 100.92.73.116: ICMP echo ...15:47:45. br-lan In IP 192.168.8.191 > 100.92.73.116: ICMP echo ...15:47:45. tailscale0 Out IP 192.168.8.191 > 100.92.73.116: ICMP echo ...Looking at the last line, the tailscale0 outbound IP is 192.168.8.191, my laptop’s local IP, which indicates the traffic isn’t being NATed correctly.
There are several ways to fix this (e.g., adjusting routes or enabling subnet routing), but for my use case I chose the simplest approach: NATing traffic through the Tailscale node. Since I only need LAN devices to initiate connections to the server, and not accept inbound connections from it, this approach keeps things minimal and predictable.
The MASQUERADE rule is a type of source NAT (SNAT) that rewrites the source IP of outgoing packets to match the interface they exit from. In this case, traffic going out via tailscale0 is rewritten to appear as if it originated from the Tailscale node (Slate 7) itself. This ensures return traffic is routed back correctly without requiring additional routes on the server or other peers.
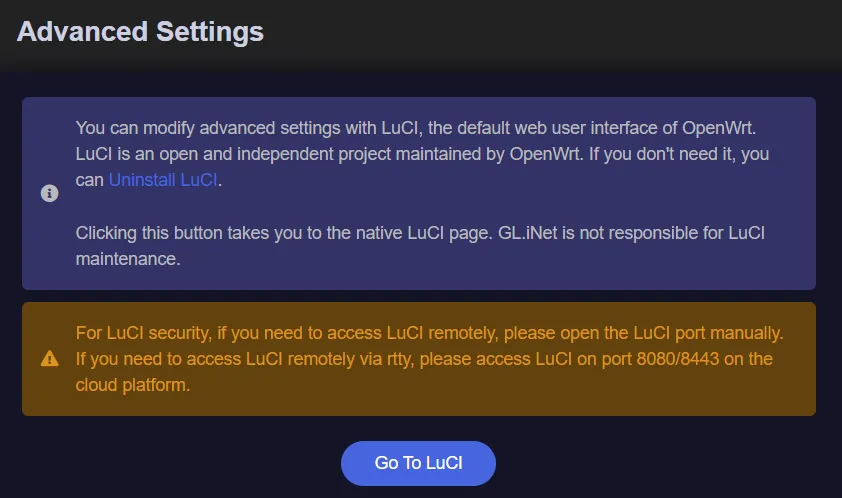
To apply this, add a MASQUERADE rule to the firewall via LuCI. In the Web Admin Panel, navigate to System → Advanced Settings, then open LuCI.
Once logged in on LuCI, navigate to Network → Firewall.
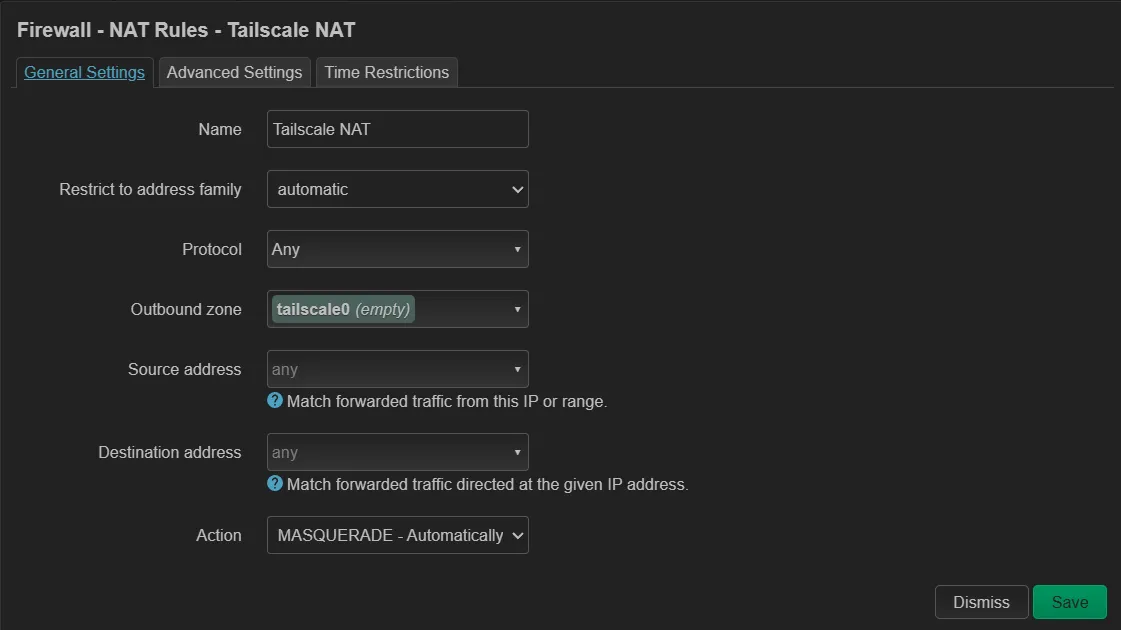
Option 1: Keep It Simple with NATh4
Navigate to the NAT Rules tab and add a new rule. Set tailscale0 as the Outbound zone and select MASQUERADE as the action. Adjust the remaining options as needed for your setup.
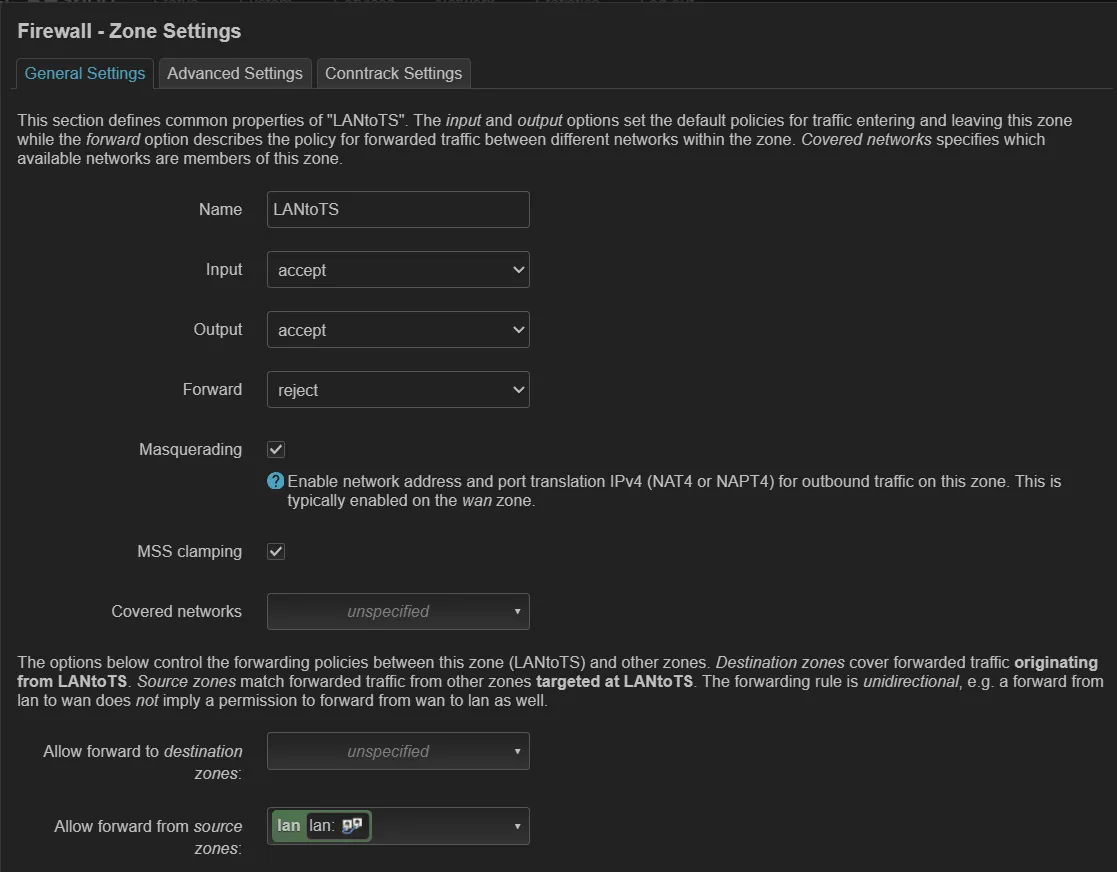
Option 2: Firewall Zone Configuration in LuCIh4
Go to the General Settings tab and create a new Firewall Zone if one for Tailscale hasn’t been auto-created yet. In this tab, set the zone name, enable Masquerading, and select lan under Allow forward from source zones.
Next, switch to the Advanced Settings tab, set tailscale0 as the covered device, then click Save.

Ping, Take Twoh4
After applying either Option 1 or Option 2 on the router, we should now get a successful ping reply from the server. Checking the request again using tcpdump, we can see that the tailscale0 outbound IP is now correctly mapped to my Slate 7 Tailscale IP.
tcpdump: data link type LINUX_SLL2tcpdump: verbose output suppressed, use -v[v]... for full protocol decodelistening on any, link-type LINUX_SLL2 (Linux cooked v2), ...16:00:25. eth1 In IP 192.168.8.191 > 100.92.73.116: ICMP echo request ...16:00:25. br-lan In IP 192.168.8.191 > 100.92.73.116: ICMP echo request ...16:00:25. tailscale0 Out IP 100.XX.XX.53 > 100.92.73.116: ICMP echo request ...16:00:25. tailscale0 In IP 100.92.73.116 > 100.XX.XX.53: ICMP echo reply ...16:00:25. br-lan Out IP 100.92.73.116 > 192.168.8.191: ICMP echo reply ...16:00:25. eth1 Out IP 100.92.73.116 > 192.168.8.191: ICMP echo reply ...Going back homeh3
As mentioned earlier, when I’m not traveling, the primary purpose of this setup is to route traffic for specific domains or IP addresses from my server through my home internet. This is especially useful for running 24/7 web scraping tasks, as it makes requests appear to originate from a residential connection rather than a hosting provider’s IP. In other cases, it also enables automation for services that are only accessible within my home network, as well as offloading or extending computing capacity for home project workloads.
In this section, I’ll walk through how I use the Tailscale App Connector for domain-based routing and a Tailscale Subnet Router for IP-based routing.
DNS Says, “This Way Please”h4
To set up the Tailscale App Connector, refer to the official documentation. On the Slate 7 web admin panel, the App Connector feature isn’t available out of the box. To have the router advertise itself as an App Connector, you’ll need to SSH into the device and run the command below.
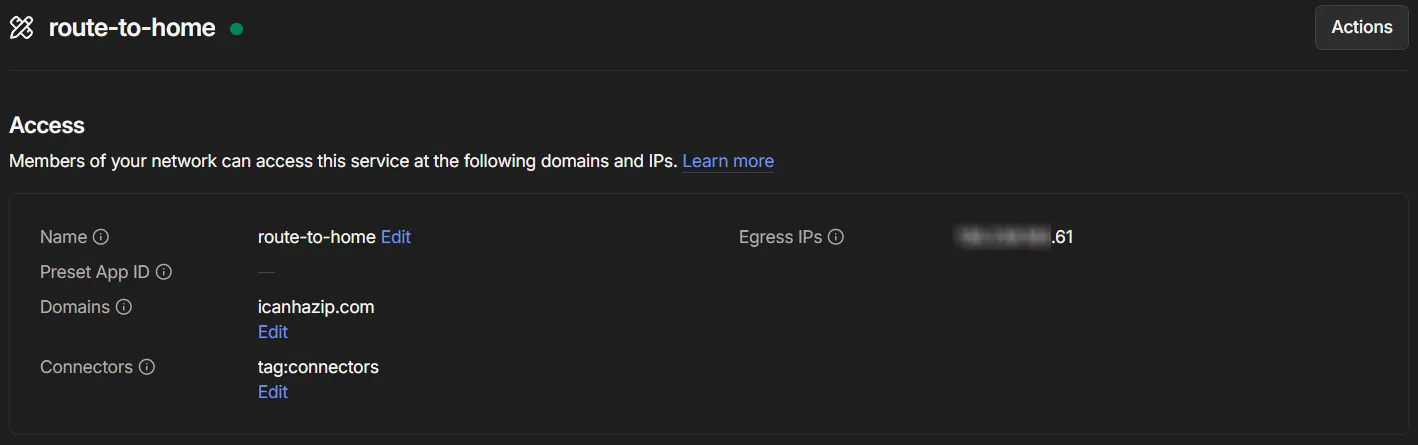
tailscale set --advertise-connectorLet’s verify that everything is working as expected. In the Tailscale Admin Console, go to the Apps tab, add a new app, and choose Custom as the target. Enter icanhazip.com as the domain, select the ACL tag of your connector, and prepare to save.
Before clicking Save, run curl icanhazip.com on your server to capture the current IP for comparison.
After clicking Save, run curl icanhazip.com again to verify that traffic for the icanhazip.com domain is now routed through your home internet. This time, the returned IP address should match your home connection

IPs Know the Way Homeh4
Routing based on IP address is much more straightforward. We simply need to configure the Slate 7 router as a Tailscale Subnet Router. This option is already available in the Slate 7 web admin panel, but it only allows advertising the WAN and LAN subnets, there’s no built-in option to advertise a specific IP address.
To advertise a specific IP, we’ll need to SSH into the router and run the command below.
tailscale set --advertise-routes=34.117.59.81/32In this example, the IP address belongs to ipinfo.io. If we run curl ipinfo.io/ip on our VPS, we should see our home internet IP returned as well.
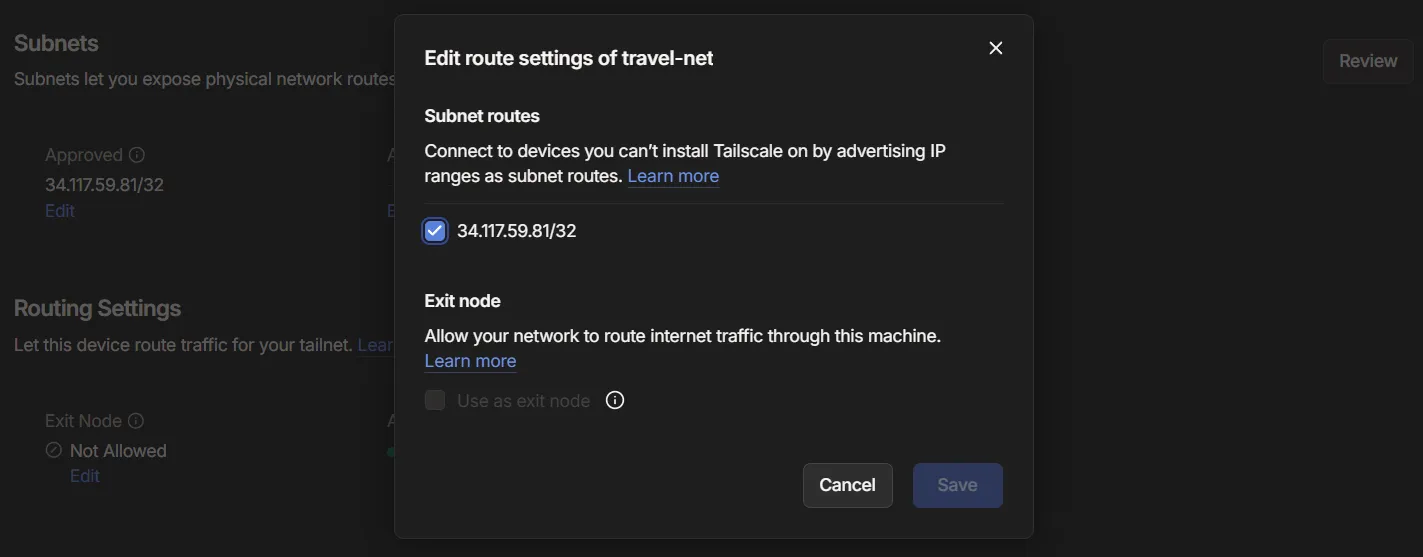
Before that works, though, we need to approve the advertised subnet route (if autoApprovers isn’t configured). To do this, go to the Tailscale admin console, locate the device advertising the route, and open its route settings. From there, enable the subnet you want to advertise and save the changes. Alternatively, you can open the device details, go to the Subnets section, click Review, and approve the route.
Once the advertised route is approved, running curl ipinfo.io/ip should now return your home internet IP address.

On Linux, new subnet routes aren’t accepted by default. To enable automatic route discovery,
run Tailscale with the —accept-routes flag:
tailscale set --accept-routes.
This applies to App Connector setups as well.
For stricter control over the tailnet, you can comment out the permissive rule in your Access Control List (ACL) and replace it with a more specific one. For example, you can define a rule that only allows devices tagged as server to route traffic through your advertised subnets or App Connector domains or exit nodes.
"grants": [ { "src": ["tag:server"], "dst": ["autogroup:internet"], "ip": ["*"], }, // Comment out the allow all connection //{ // "src": ["*"], // "dst": ["*"], // "ip": ["*"], //},]Packets Found Their Way Homeh3
And that’s the full setup I’ve ended up with using Tailscale and my Slate 7 travel router, from getting initial connectivity working and troubleshooting the initial quirks, to shaping it into something I can actually rely on day to day.
It’s not overly complex, and it’s definitely not the only way to do it, but it strikes the right balance for my use case. It gives me stable access to my VPS wherever I am, along with the flexibility to route specific traffic back through my home network when needed.
A lot of this wouldn’t feel nearly as seamless without Tailscale. Their approach to networking really does feel like magic, removing so much of the usual complexity around VPNs and routing, and making everything just work across devices and networks.
In the end, it’s become one of those setups that quietly runs in the background and simply does what I need it to do. Nothing fancy, but it works.